Get Started
INFO
If this is your first time knowing DatamineHub, you may wonder what DatamineHub does and whether it can meet your needs. You can quickly browse our brief introduction and main concepts
INFO
If you don’t have an account yet, you can give it a try. DatamineHub offers a permanent free tier, and no credit card is required for registration.
You can also start with mobile app and scan your barcode with mobile app for free.
TIP
Most features are available on both DatamineHub Mobile App and Web App. Except the File Import, Data Export, Reports and Charts are only available on Web App. While the barcode scanner is only on Mobile App.
Enter Data (Mobile and Web App)
DatamineHub includes various features. Typically, enter data is the first step. Let's see how to do that.
In DatamineHub, there are two different ways to start entering data, which we call Template based and non template based.
TIP
If you are not familiar with the concept template, you can first check Concept Template
You can also check the Template doc section to know more details about how to create a template.
INFO
The below screenshots are based on DatamineHub mobile app, but the workflow works the same on the web app.
Template Based Workflow
In this section, we give steps on Template Based, and Non Template Based in the next section.
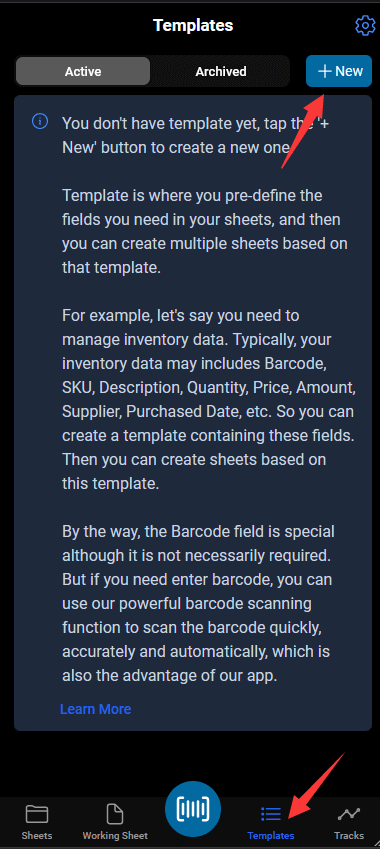
1: Create your first template:
2: Create your template fields:
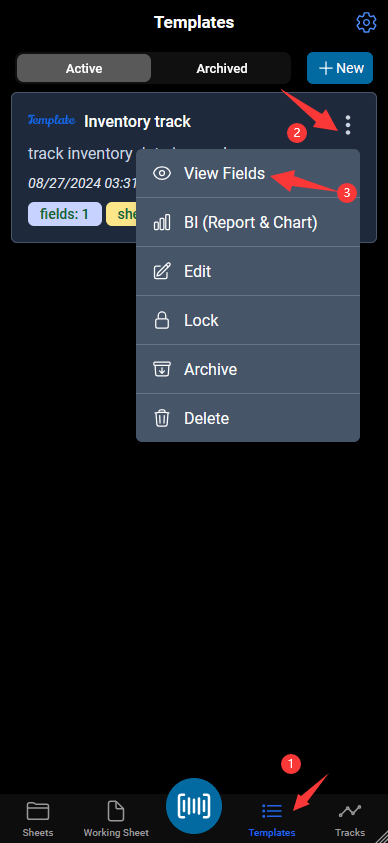
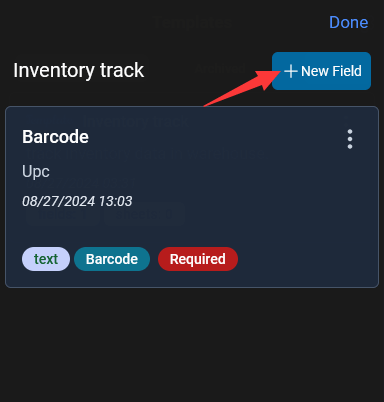
Your just created template doesn't have Fields yet. Follow screenshot below to create your fields for this template.
TIP
If you are not familiar with the concept field, you can first check Concept Field
You can also check the Field doc section to know more details about how to create fields.
3: Create your first template based sheet:
In the previous two steps, you have the template and its fields created. Now, let's create your first template based sheet.
TIP
If you are not familiar with the concept sheet, you can first check Concept Sheet
You can also check the Sheet doc section to know more details about how to create sheet.
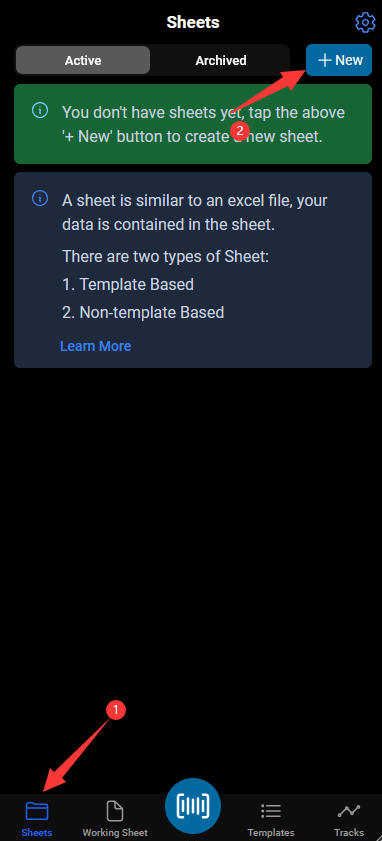
Provide a name and description for your sheet, choose Template Based, select your template just created.
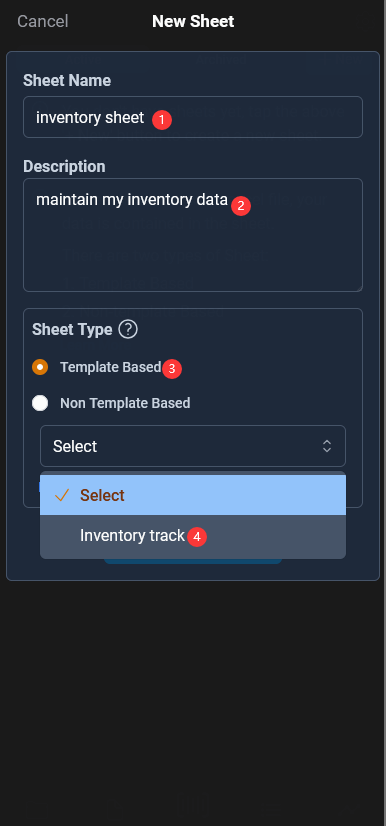
4: Add your first item to sheet.
Now, you have your first sheet created. Ready to add items to the sheet. To do so, navigate to Working Sheet.
TIP
If you are not familiar with the concept working sheet, you can first check Concept Working Sheet
You can also check the Item doc section to know more details about how to add items to working sheet.
Follow below steps to scan your barcode and add the other information(the fields you defined in your template):
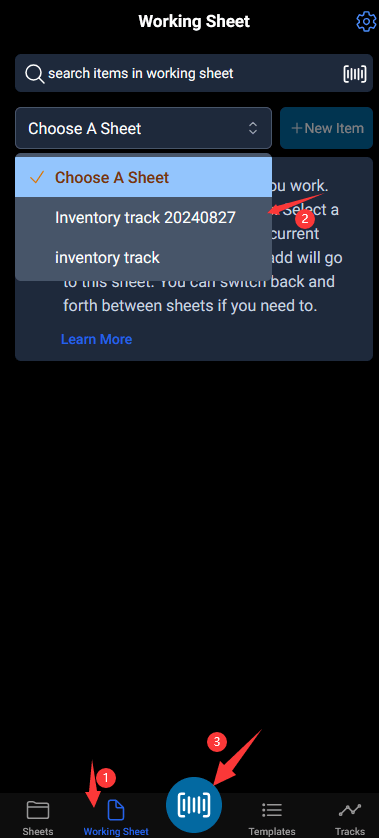
If you don't need to scan barcode, tap the '+ New Item' button, and then in the modal view, provide all your information:
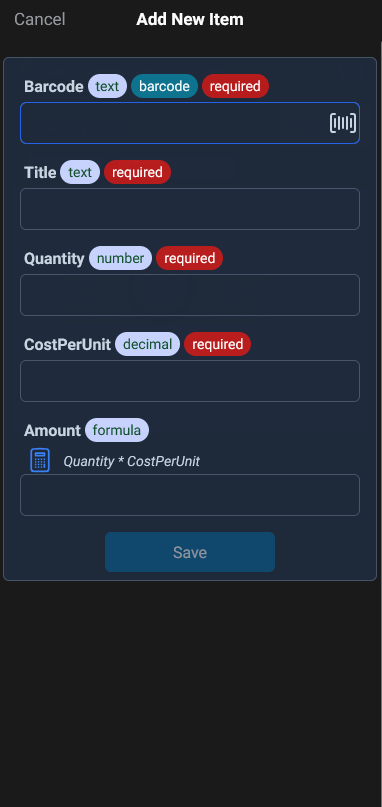
At this point, your first piece of data has been successfully entered. Repeat this process to add more items to the sheet, you can also create more templates and sheets to manage data in different industries efficiently.
Non Template Based Workflow
In this section, we give steps on Non Template Based.
1: Create your first non template based sheet:
TIP
If you are not familiar with the concept sheet, you can first check Concept Sheet
You can also check the Sheet doc section to know more details about how to create sheet.

Provide a name and description for your sheet, choose Non Template Based.
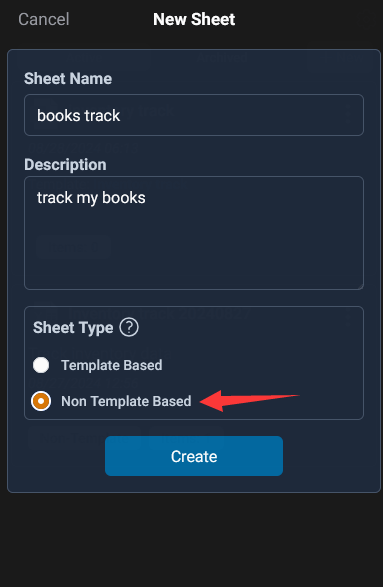
2: Add your first item to sheet.
Now, you have your first non template based sheet created. Ready to add items to the sheet. To do so, navigate to Working Sheet.
TIP
If you are not familiar with the concept working sheet, you can first check Concept Working Sheet
You can also check the Item doc section to know more details about how to add items to working sheet.
Follow below steps to scan your barcode. If you don't need to scan barcode, tap the '+ New Item' button:
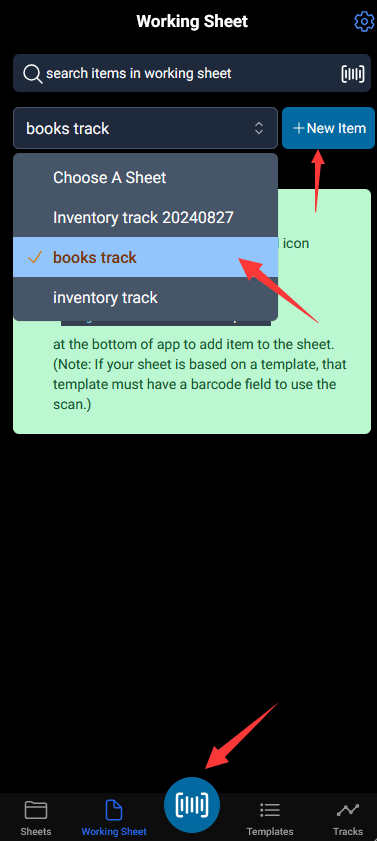
There's nothing we can enter to the sheet, it's because this is a non template based sheet, we haven't defined any fields.
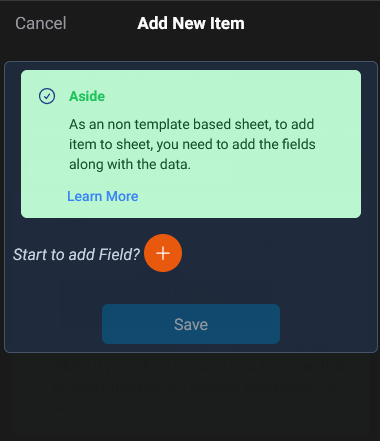
To do so, tap the orange circle button, start to add fields for this sheet.
TIP
If you are not familiar with the concept field, you can first check Concept Field
You can also check the Field doc section to know more details about how to create fields.
Once you added a field, such as Barcode(If you tap the SCAN icon at the bottom of the screen to add item, the Barcode field will be created automatically for you.), you can start to enter the data.
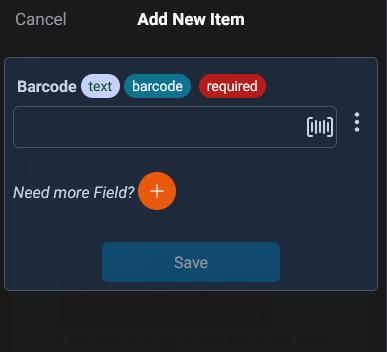
At this point, your first piece of data has been successfully entered. Repeat this process to add more fields to the sheet and enter your data.
Upload Files - Web App Only
If you have batch of data already in files, you can import them via web app.
You can also check the Import File doc section to know more details about how to create fields.
Export Data - Web App Only
To export your data, you can do it on your sheets page:
[Double click the image to enlarge] 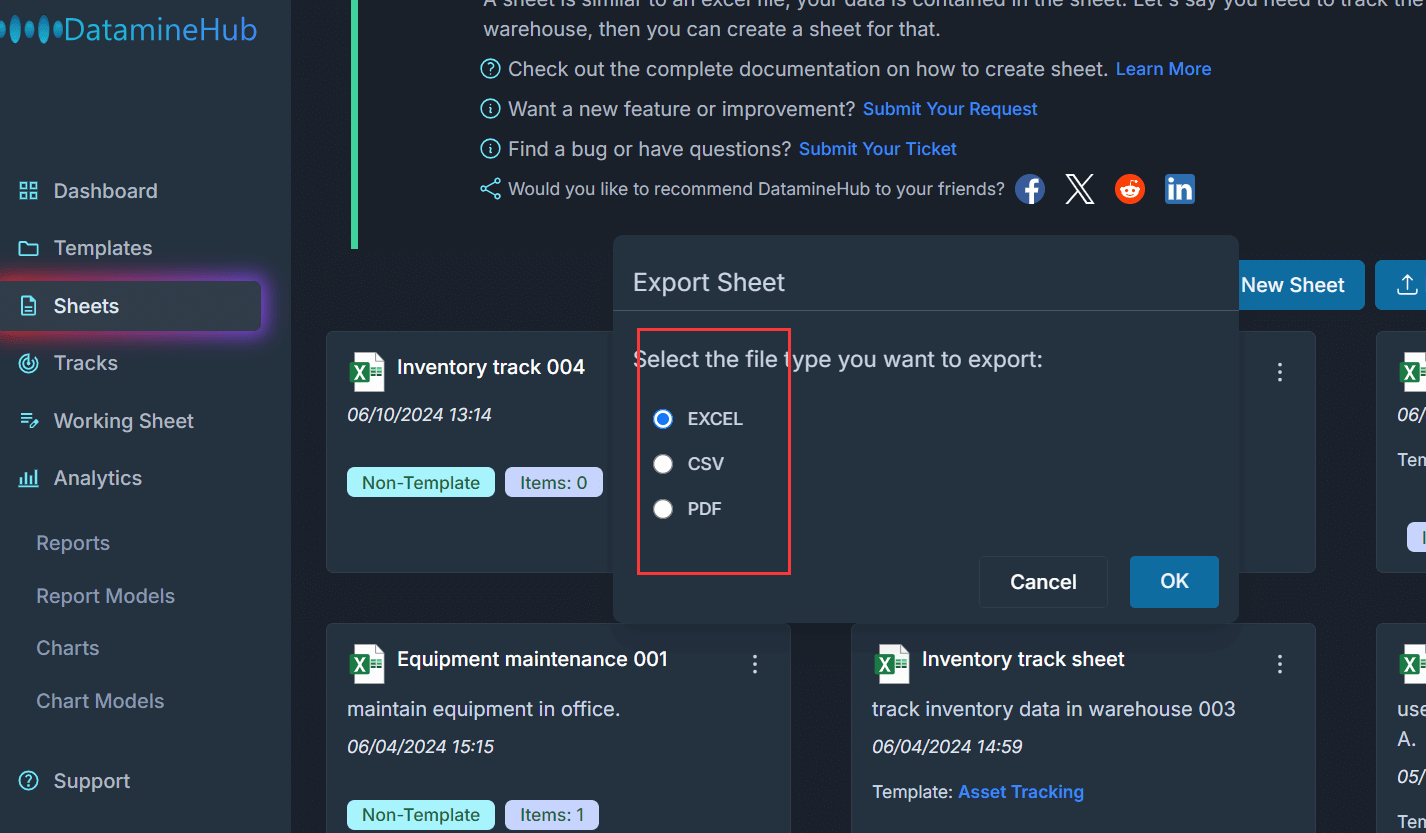
Quick Check In / Check Out
Do you want to check in/out inventory with just barcode scan? If so, this is a perfect feature for you.
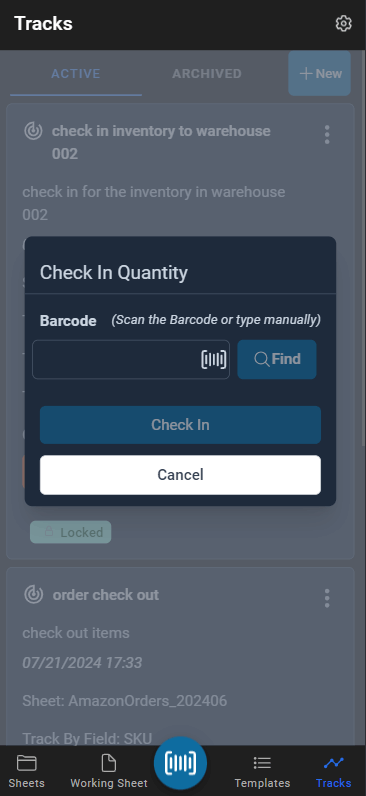
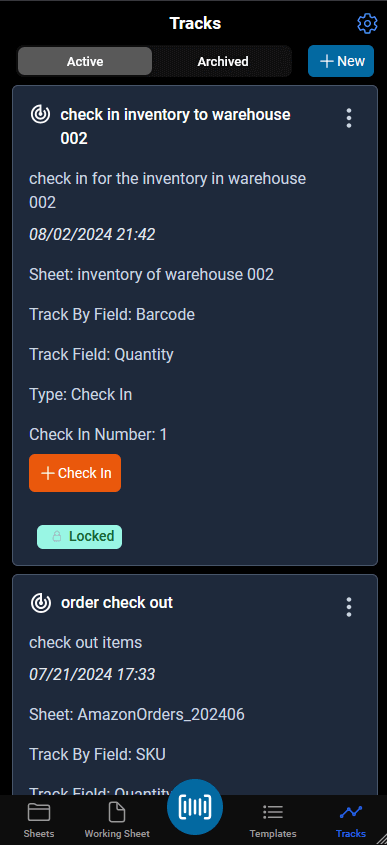
Check the Track doc section to know more details about how to do it.
Analyze Data - Web App Only
Dataminehub provides customized reports and charts to further analyze your data on web app.
[Double click the image to enlarge] 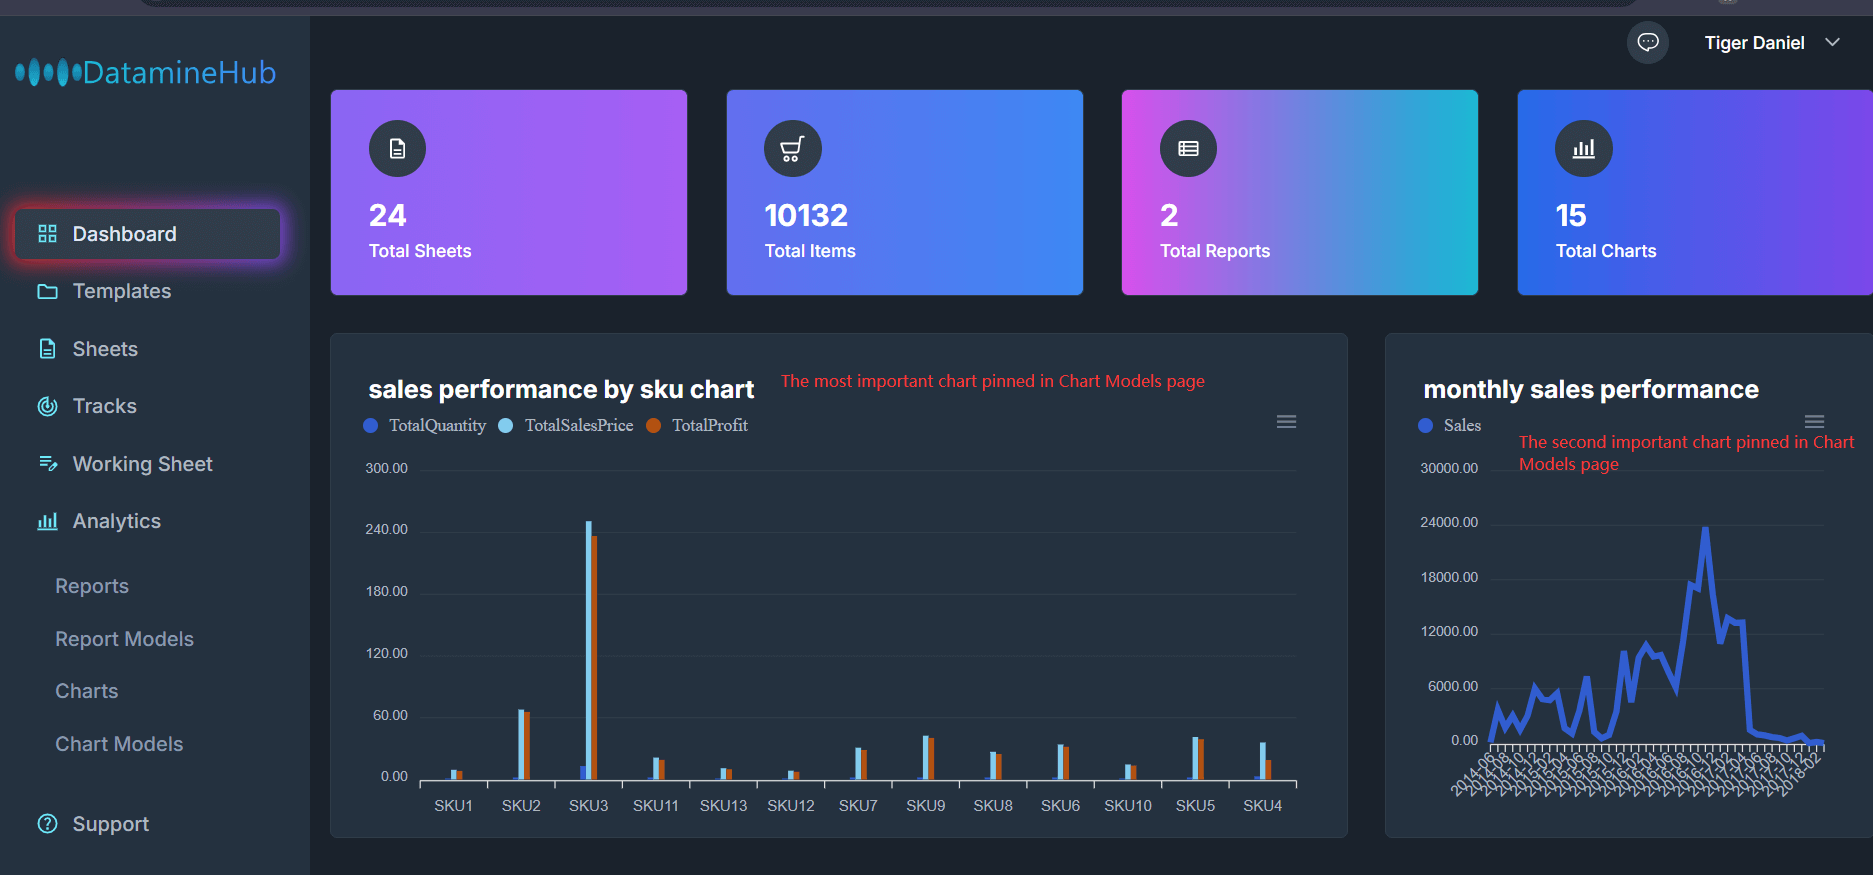
Check the Report doc section to know more details about how to design reports.
And, Chart doc section to know more details about how to visualize your reports.
